No products in the basket.
How to Install Your Wardrobe Floor Liner
Built-in wardrobes are a fantastic way to increase space in your room and give it a completely fresh feel. Built to make the most of the space and shape of your room.
Floors in rooms are not always perfectly level which is why when it comes to installing fitted furniture, your wardrobes can sometimes be slightly out and not flush against a wall or to the floor, leaving unsightly gaps. The option of floor liners in our fitted wardrobes are a great solution for project completion and extra stability to prevent this, helping you get that perfect fit and enabling you to position your fitted wardrobe in a range of different spaces and positions.
Whether you have installed a wardrobe yourself before or it is the first time, just follow our step-by-step guides and view our instruction videos here or get in touch with our experts for guidance directly on 01543 679 202


What Are Floor Liners?
Floor liners are used to ensure you get a professional look in your wardrobe by allowing you to square your opening when floors and walls are slightly uneven. They will help with levelling, ease of fixing and will increase the stability of the finished installation.
Our Perfect Bespoke Made To Measure Wardrobes In 3 Easy Steps
- Measure - Follow our guides on how to measure the space of your room accurately for a perfect fit.
- Design with our configurator
- Order and installation

Use our configurator to design your wardrobe and view it in real time. Here you can add all the extras you require at each stage so there are no hidden costs or surprises upon completion.
Our configurator allows you to:
- Add your wardrobe dimensions
- Choose a range of frame
- Number of doors
- Door design
- Door panel material
- Frame colour
- End panels if required
- If you require liners around the door
- Interior layout
- Option to add standalone furniture
- Review the breakdown and image of your bespoke built wardrobe
Once you are happy with your bespoke designed wardrobes you have created using our configurator, place your order online for direct delivery.
However, if you are not 100% sure on your measurements, why not take advantage of our design and installation service. Book a free design visit here.
Step By Step Floor Liner Installation Guide
- Mark a position of 610mm from your back wall
- Measure back 90mm from your mark to position the liner
- Measure between the wall and end panel for the floor liner
- Cut the liner to length and mark at least 6 evenly spaced fixings
- Use spacers to level the floor liner if necessary
- Drill the holes carefully and then fix the liner in position
- If unsure give us a call and speak to one of our expert installers
Frame Options
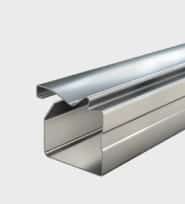
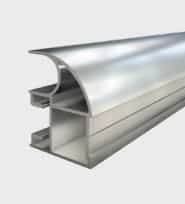

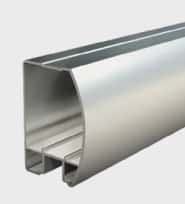
Eden Range
6 aluminum frame colour choices
Available in glass/mirror
or MFC wood effect
Soft close feature available